Last year, an accident left my right arm and shoulder numb and paralyzed. After extensive testing, doctors determined that I had severely injured my right brachial plexus — a crucial nexus of nerve pathways carrying signals back and forth between my spinal column and right upper extremities. It was made clear that I shouldn’t expect to recover full feeling or functionality. Of the many fears accompanying this pronouncement, the most visceral pertained to writing.
 Sure, I had a lot of other things on my mind, and many more urgent problems at the outset. But as a writer, I have long relied on using a keyboard, mouse, and pair of hands to process and communicate my thoughts.
My concern ran deeper than just having to slow down, because how we create impacts what we create. Different tools lead to different creations. Suffice it to say: during my week in the hospital, even before I could move (or even feel) any part of my injured limb, I began to research adaptive design solutions for one-handed writing.
![]()
 Left to Write is a three-article set about adaptive writing technologies for one-handed users. This first piece explores accessible keyboards; the next details the process of developing a new keymap for comfortably touch-typing with one hand on a conventional two-handed board; the third explains how to convert your own QWERTY into a single-handed KURTY.
Voice to Text: The Pathway to Verbosity
I started where most people in similar situations presumably do: trying out voice-to-text software options. Thanks in part to ever-evolving AI, such tools are increasingly accessible and work for a lot of people across a variety of use cases. Indeed, I quickly began relying heavily on speech-to-text (STT) tech for crafting straightforward texts and emails.
 But for more involved writing projects, I found that dictation-driven approaches played into personal weaknesses, such as my natural tendency to ramble. Using STT as a primary writing tool led to long drafts, which required painstaking self-editing processes. For some, voice-to-text may serve a suitable and self-contained solution, but abilities and needs vary.
For me, writing isn’t just a matter of putting down letters to form words and sentences on a (digital) page — it’s a dynamic and fast-paced activity in which I self-edit on the fly … jumping around between lines, paragraphs, and pages … deleting, rewriting, rearranging as I go … and repeating all of the steps above, in shifting sequences, over and over and over again. And what’s written is inevitably a product of these processes, shaped by a blend of intuition, muscle memory, and more. I sometimes envy those who are able to write more straightforwardly, but for better or worse: I’m not that kind of writer.
One-Handed Typing on a Normal Keyboard
It became clear that I would need to prioritize hand typing in my writing toolkit, but before trying out specialized keyboards, I was curious to see if there were better ways to work with hardware I already had at hand. This line of inquiry led me to one-handed touch-typing methods for using two-handed keyboards. I zeroed in on TypingTutor.club, which has a series of over 400 step-by-step tutorials that teach a style of single-handed touch-typing, one (small) step at a time.
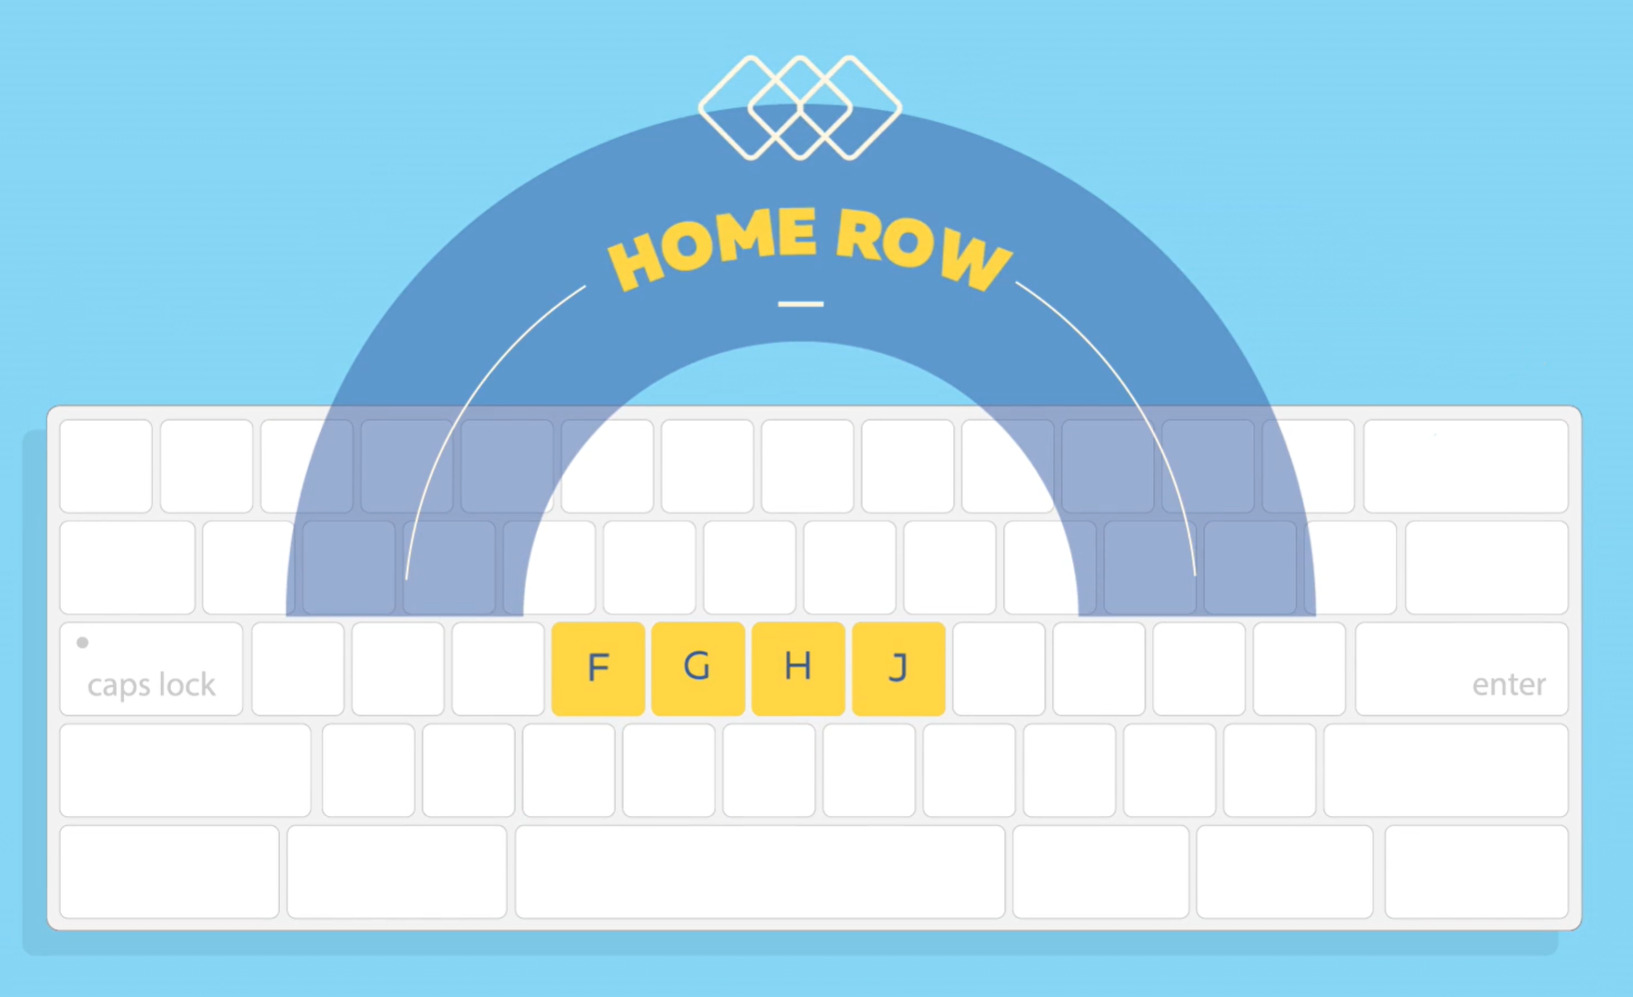
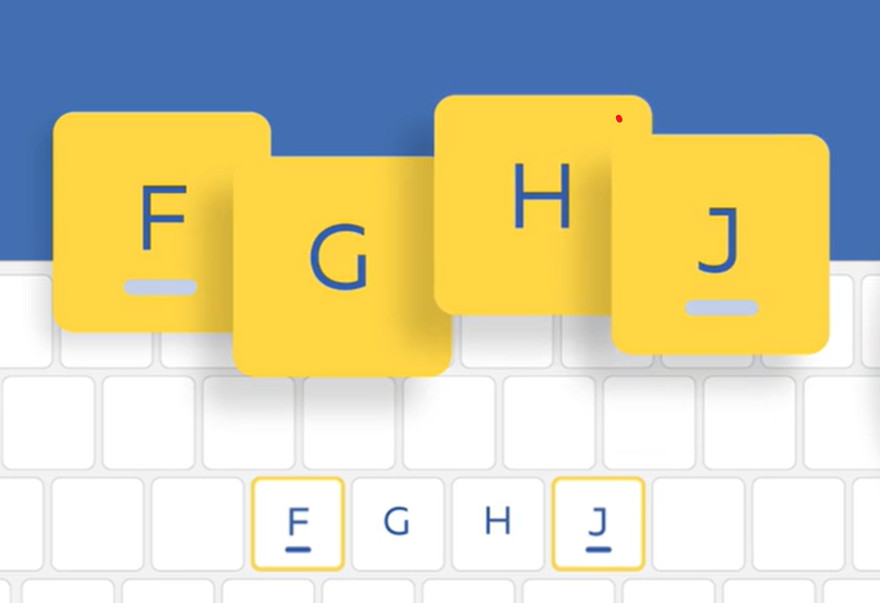 The physical setup is simple, involving familiar “Home Row” keys, with a twist: rather than resting your pinky and pointer fingers on the S and F keys (which is the typical starting setup for two-handed typists), you begin by placing them on the F and J keys — a move of just three keys over to the right. As a bonus, this setup allows you to continue making tactile use of “Home Key” ridges for easy orientation (shown as underlines in the adjacent illustration). From there, you can imagine roughly how things branch out — a newly centered single hand ranges freely across a whole keyboard.
 I must say that this system is surprisingly easy to get started on. But an approach forcing it to cover twice as much area puts a lot more pressure on one’s typing hand.
I could see this system working well for someone with a short-term injury, who can afford to put up with a one-sided increase in wrist pain for a bit. But with my long-haul impairment, I feared adding ongoing repetitive physical stress — especially given the newly elevated importance of my left hand (as my only working one). I decided that if I was going to type with one hand longer-term, I would need to find a typing solution optimized for single-handed usage by design. And so I began to dive deeper into the realm of dedicated hardware.
Three One-Handed Keyboard Solutions
After a lot of research, I narrowed my focus to three one-handed keyboards. Even though each of these designs shares a common functional goal, they are remarkably different in fundamental ways. Each of these specialized keyboards is also rather expensive (from $500 to $1200). Between their significant differences and substantial price tags, I couldn’t just pick one option and hope for the best – I needed to try each of these three finalists before making a decision. Thankfully, I was able to borrow them from a state loan program, MNStar, which has a library of adaptive technologies for those in need. So I gathered and compared all three contenders, considering pros and cons of each.
A) The ‘Key Bowl’ — Maltron’s One-Handed Keyboard
Curving a keyboard for the sake of ergonomics is a common design strategy today, but it was groundbreaking in the 1970s. Back then, a young company called Maltron first made a splash with a curved two-handed keyboard, then came out with a radical one-handed option.
 Like other board layouts before it, such as the DVORAK, this hardware featured an optimized layout that was deemed superior to the conventional QWERTY, locating more frequently used keys in more easily accessed places. But it was the dramatic curve that really stood out.
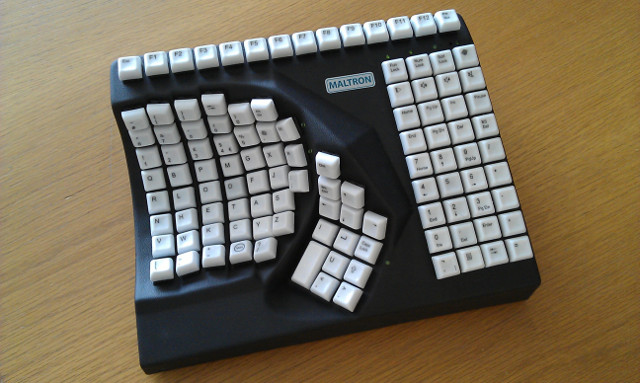
Most of the keys on the Maltron, including the entire alphabet, were set into a semi-shallow, bowl-shaped space (known as a “keywell”). Ergonomics drove this design: a concave space reduces the distance between fingertips and typed keys, so that hand movements are largely limited to small pivoting actions within a confined space. The board is still being produced today, decades after its debut, which speaks to its staying power. But aside from a kind of clunky retro look, the design has some significant functional downsides.
 While the design does reduce movement inside of the “bowl” area, there are still a lot of keys outside of the bowl. This was perhaps inevitable, because at the end of the day (like standard keyboards) the Maltron has over 100 keys. That’s simply too many to fit into a curved hand-wrapping space using regularly-sized keys.
Within the keywell, I did find myself moving my hand less — but larger moves into and out of the well at least partially cancelled that out. After testing the other boards, one unexpected thing I came to appreciate was the Maltron’s full key set. With that, even if the layout made it tricky, I could at least hunt and peck around when stuck. A full set of keys may seem like a given on any keyboard, but the next two designs illustrate that old adage about how less can be more.
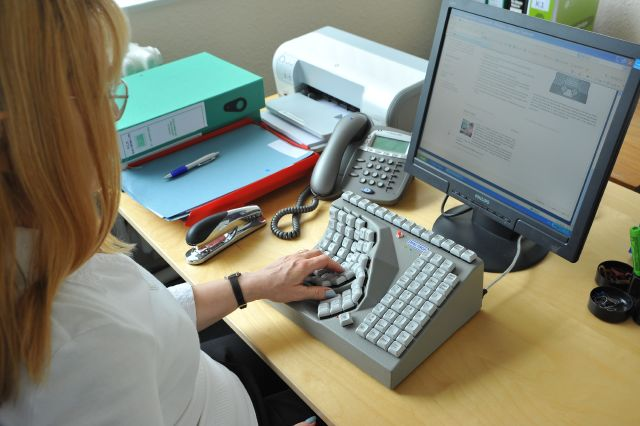
B) The ‘Big Fan’ — TIPY Keyboard + Joystick Mouse
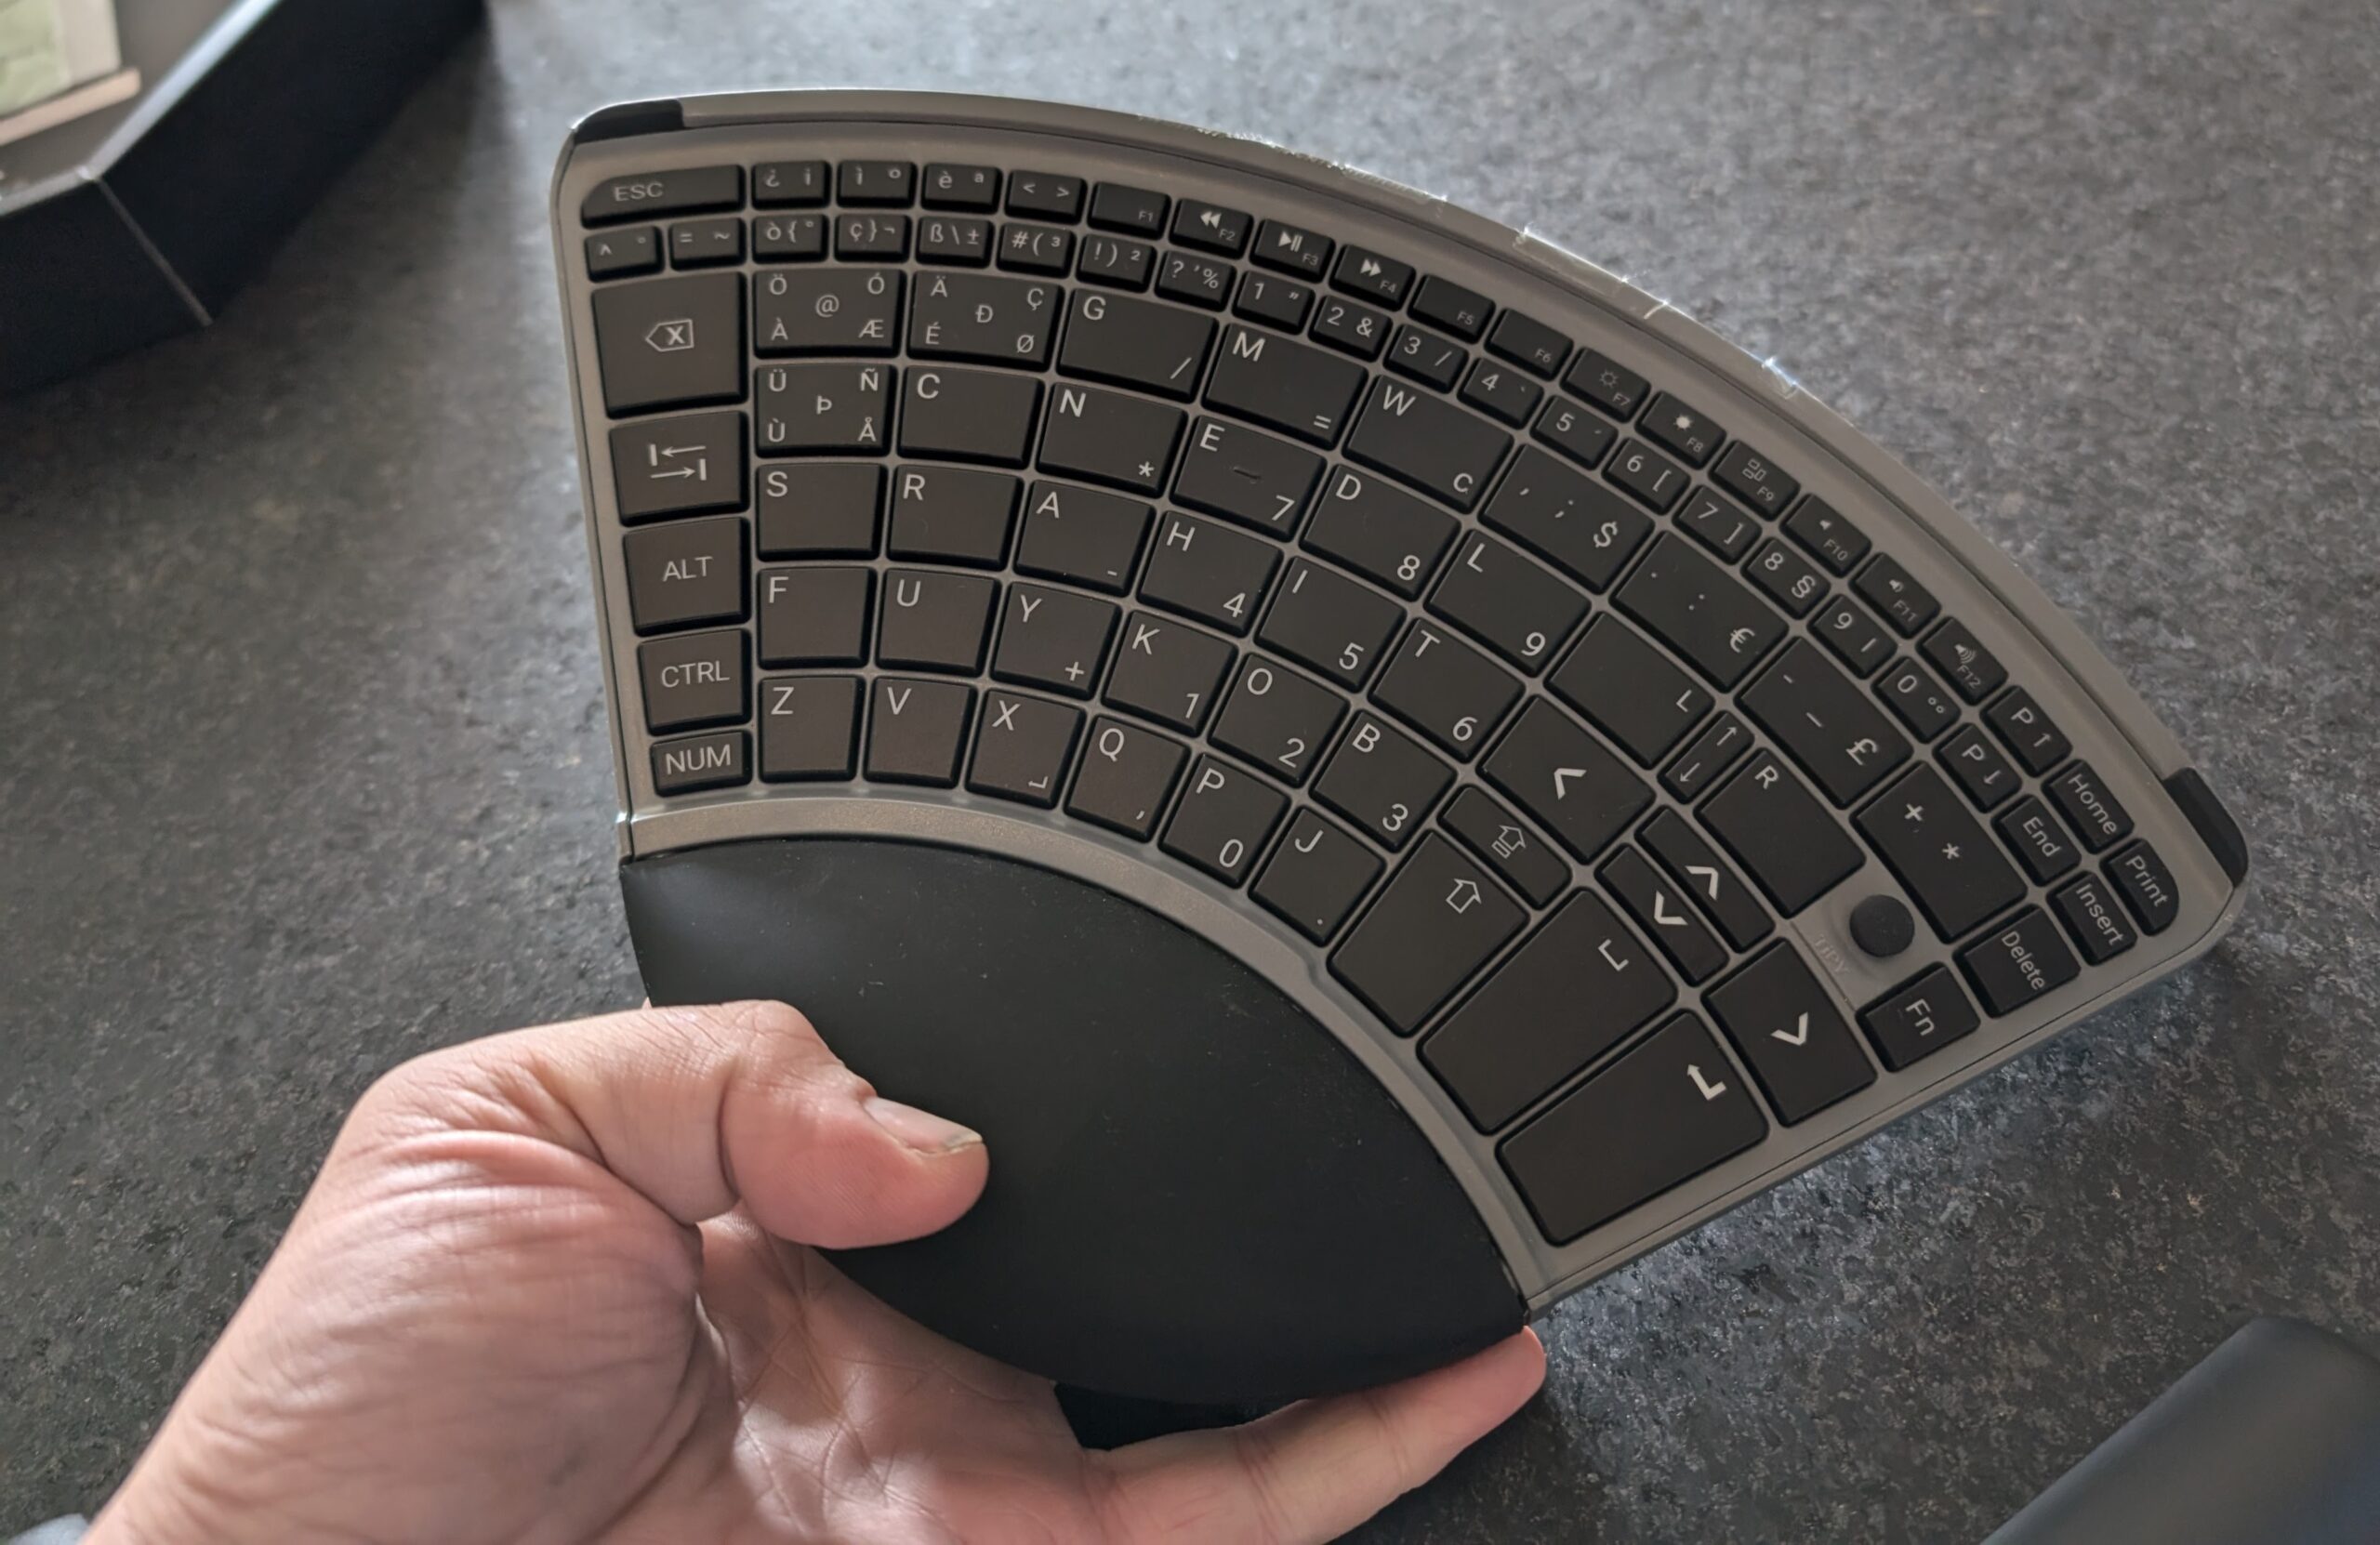
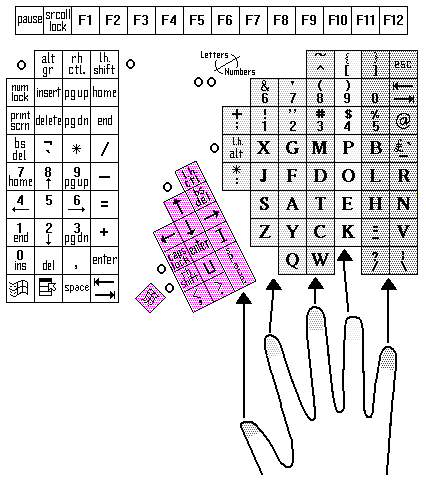
Like the Maltron, the TIPY keyboard has its own custom layout, likewise designed to help limit hand movement. But in essentially all other ways, the designers took radically different paths. The TIPY keyboard is essentially flat, shaped like a folding fan (or a traced hand with fingers splayed out wide). Most keys can be reached by just flexing fingers up and down after resting one’s wrist on a bump at the base.
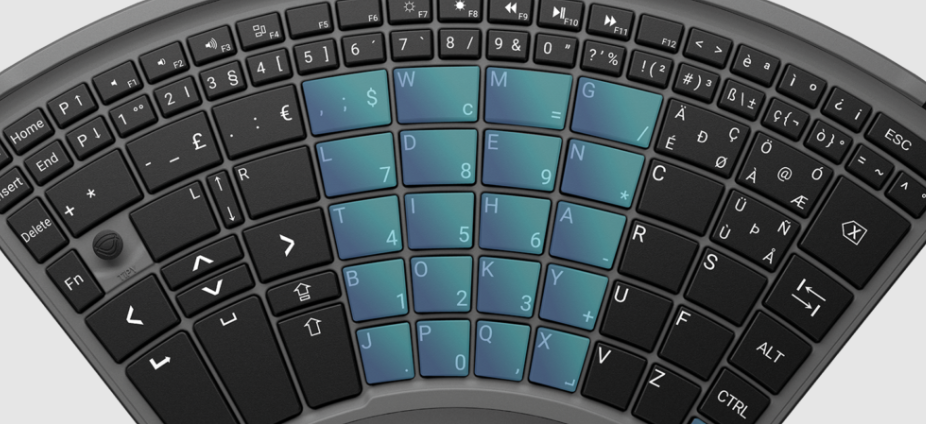 Key reachability on this board is achieved in part by deprioritizing lesser-used keys, making them much smaller and situating them along the curved top edge of the keyboard. But the TIPY also doubles up the characters on a lot of the more central keys — overlaying a number pad, for example, in the middle of the alphabetical key set. Labels added to these and other keys indicate additional functions, and ultimately allow the board to operate with fewer keys in total.
To generate the secondary and tertiary outputs shown on the labels, a user employs “modifier” and “lock” keys – which are familiar to us as key categories thanks to Ctrl, CapsLock, and the like. Like those, custom modifiers and locks on the TIPY add more layers of functionality to keys, particularly: easily reached ones toward the center of the board. Some keys have just one added function, while others have multiple.
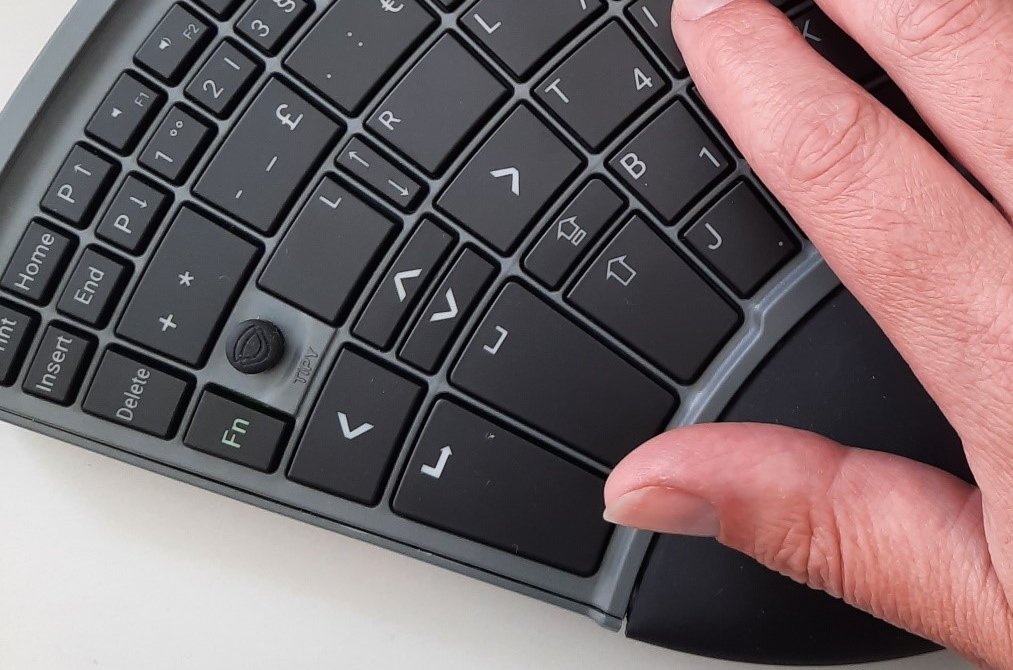 The TIPY also features a built-in “eraser head” joystick-style mouse, similar to the TrackPoint ones I’ve been using for years on my Lenovo laptops. For me, that was a pleasantly familiar touchstone; but for any user, having a built-in mouse analog offers a convenient way to further reduce hand movement. This also represented a big difference from the Maltron, which assumes users would employ an external mouse, impairing overall ergonomics.
Despite finding the design compelling and tutorials helpful, I struggled to relearn the rest of the TIPY layout from scratch — a challenge no doubt compounded by my having to do it with my non-dominant and more awkward left hand. I have no doubt that younger people who don’t have to both unlearn an old way of typing and internalize a new method would have an easier time with this board. But after decades of QWERTY, I yearned for something a bit more familiar.
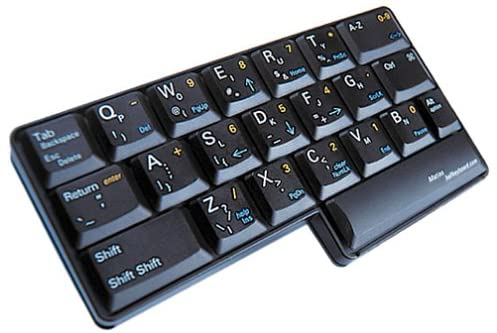
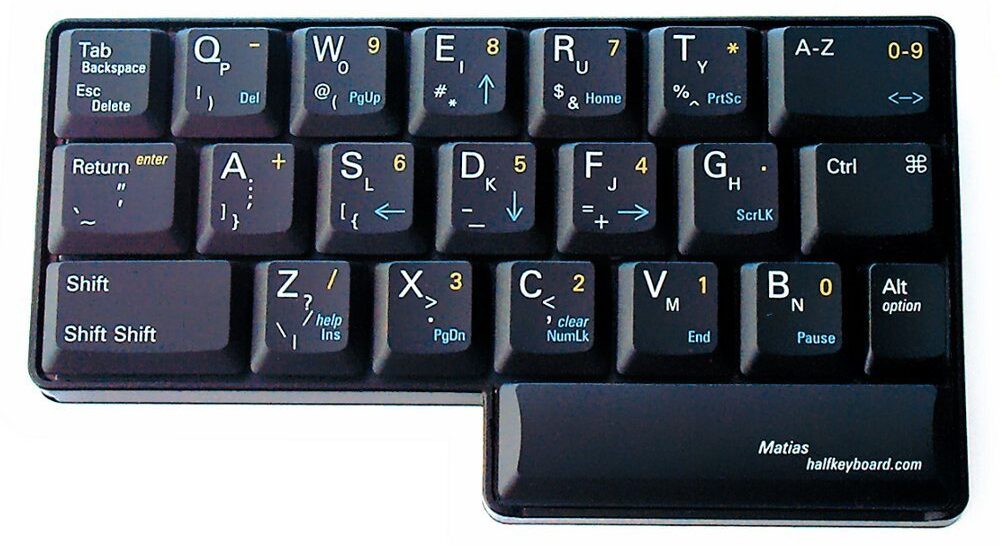
C) The ‘Mirror Board’ — Matias Half-QWERTY Keyboard

Unlike the two others considered above, the Half-QWERTY (AKA The Mathias Half-) Keyboard has layout elements in common with a two-handed QWERTY board. But, at first glance, what’s far more striking is that it’s really small — with just 22 keys, it is way smaller than the Maltron, and has about a quarter as many keys as the TIPY.
 This smallness puts a lot of demand on fewer keys, ramping up requisite modifier and lock roles to produce all of the functions and outputs of a normal-sized board. We’ll get back to that higher-order complexity in a bit.
But first, we’ll examine the “default” layer of the board — the outputs you get if you press core keys on their own. These keys represent the left half of a QWERTY keyboard’s alphabet. Generating the other half is where the really neat trick of this design comes into play.
Holding down the requisite modifier while pressing a default-layer (left-side) letter key generates the secondary (right-side) letter labeled on that key. But the trick is in the locations of those letters: they’re all mirrored across an invisible center line, or “folded over” from where they’d normally be on the right. So, for instance, a Q (upper left) becomes P (upper right) and so on.
At first, that may seem utterly unintuitive. Why not just “lift” the right side letter set up as a whole, shift it left, and lower it back down, for instance? That does make intuitive sense in terms of our spatial awareness, but touch typing has a lot more to do with muscle memory.
Studies have shown that touch typists often can’t draw a complete keyboard layout, even if they can press every key without looking. It’s less about remembering where each key is and more about which finger presses the key and how. From personal experience: I was shocked at how fast I was able to learn the alphabet on this keyboard. It really does feel like my left hand is tapping into the muscle memory of my right.

The problem I found is that things start to get much more difficult once the learning phase gets beyond letters (and, to some extent, numbers), which brings us back to that pesky complexity problem of using smaller keysets. Removing more keys crowds ever more functions onto those that remain. Keys on this board need up to six labels in various positions (of different sizes and positions and colors) to indicate their additional outputs. If the designer had retained more keys and added some kind of built-in mouse, this could have been an amazing one-handed solution for me. I loved parts of the design, but not the whole.
Choosing Option (D) None of the Above
I set out to consider three keyboards, but am now back to writing on what looks like the same old keyboard I used before my injury, (complete with its built-in TrackPoint mini-mouse). Underneath the hood, however, it works in radically new and different ways. In the simplest terms: I added an advanced system of shortcuts so that I can touch-type one-handed on just half of a two-handed board.
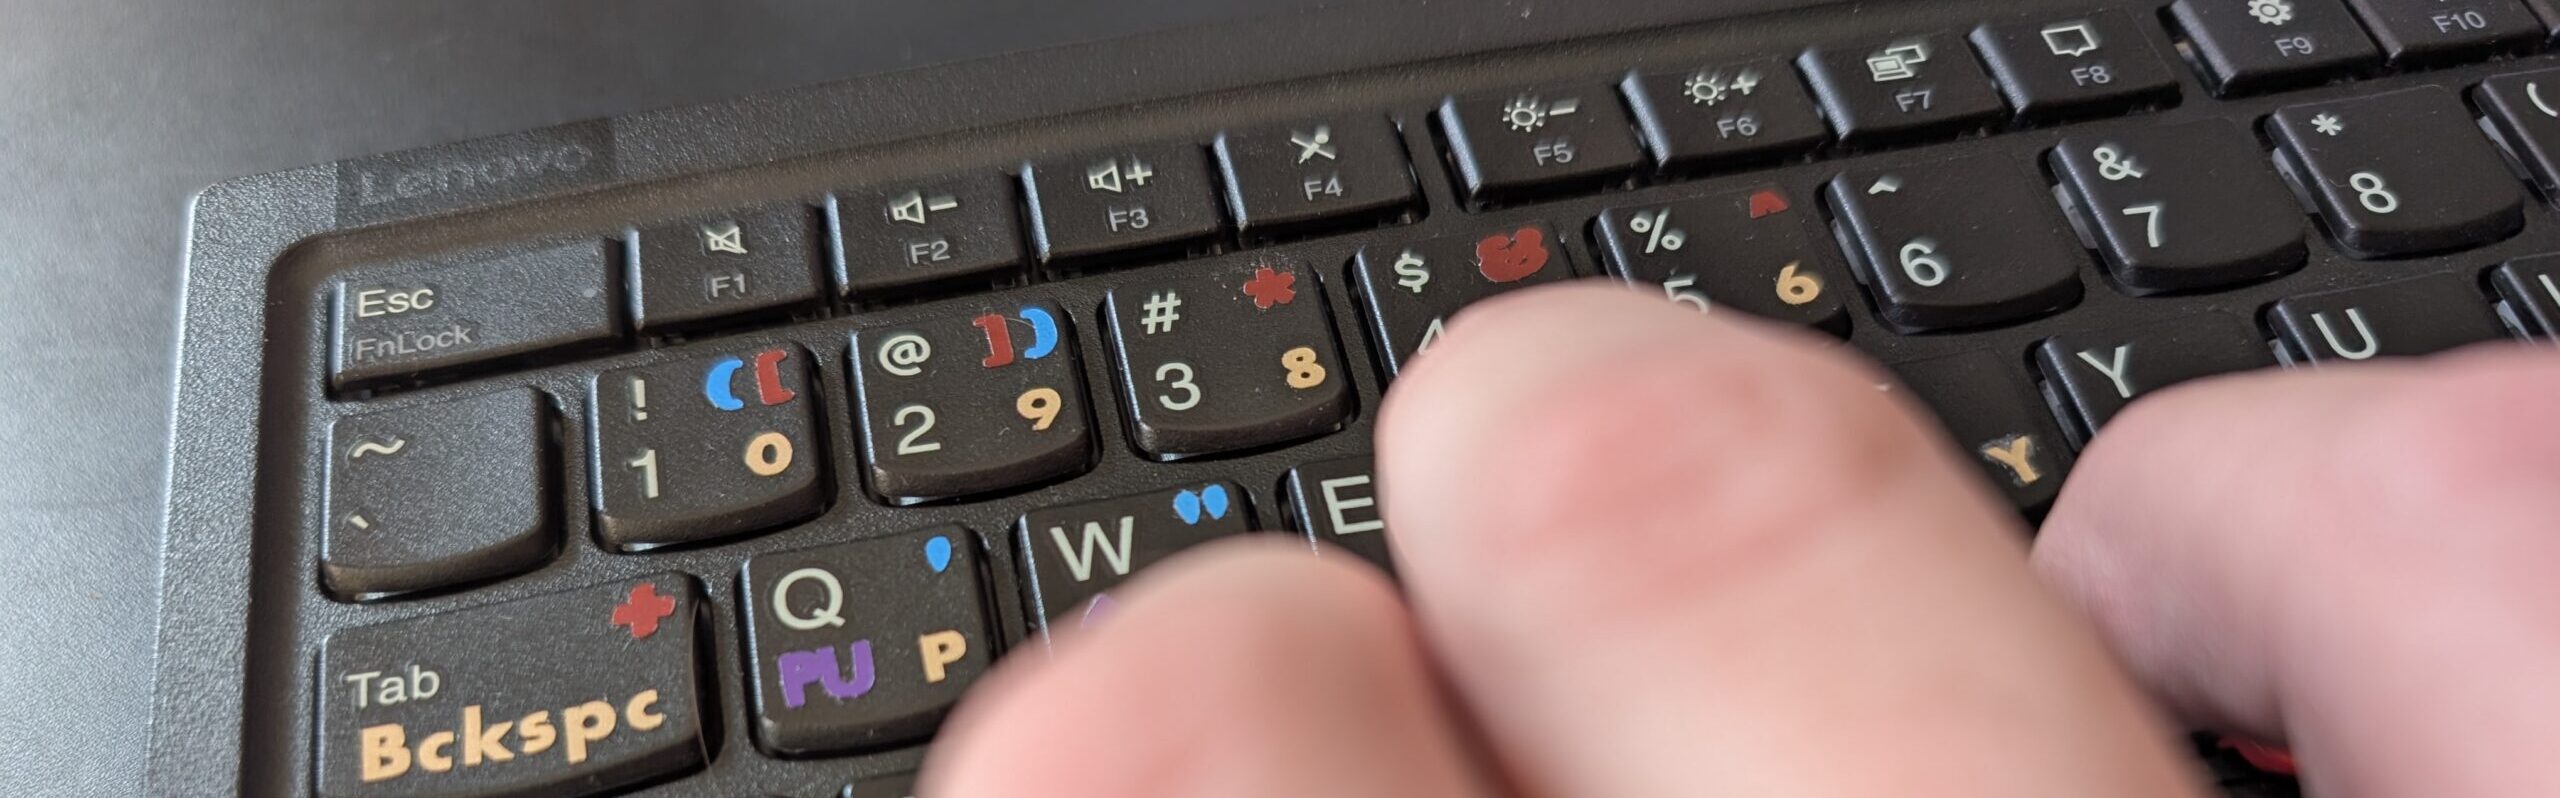
After growing to appreciate the familiarity of the Half-QWERTY, but also becoming frustrated with its limits, I began looking for similar alternatives. That search led me to discover that there are a lot of people out there creating custom keymaps in various ways, adding new modifier-based outputs to existing keysets. I’m not a programmer, but I found a shockingly easy way to set up custom key combinations on a Windows computer, which would allow me to turn my two-handed keyboard into a best-of-all-worlds typing solution.
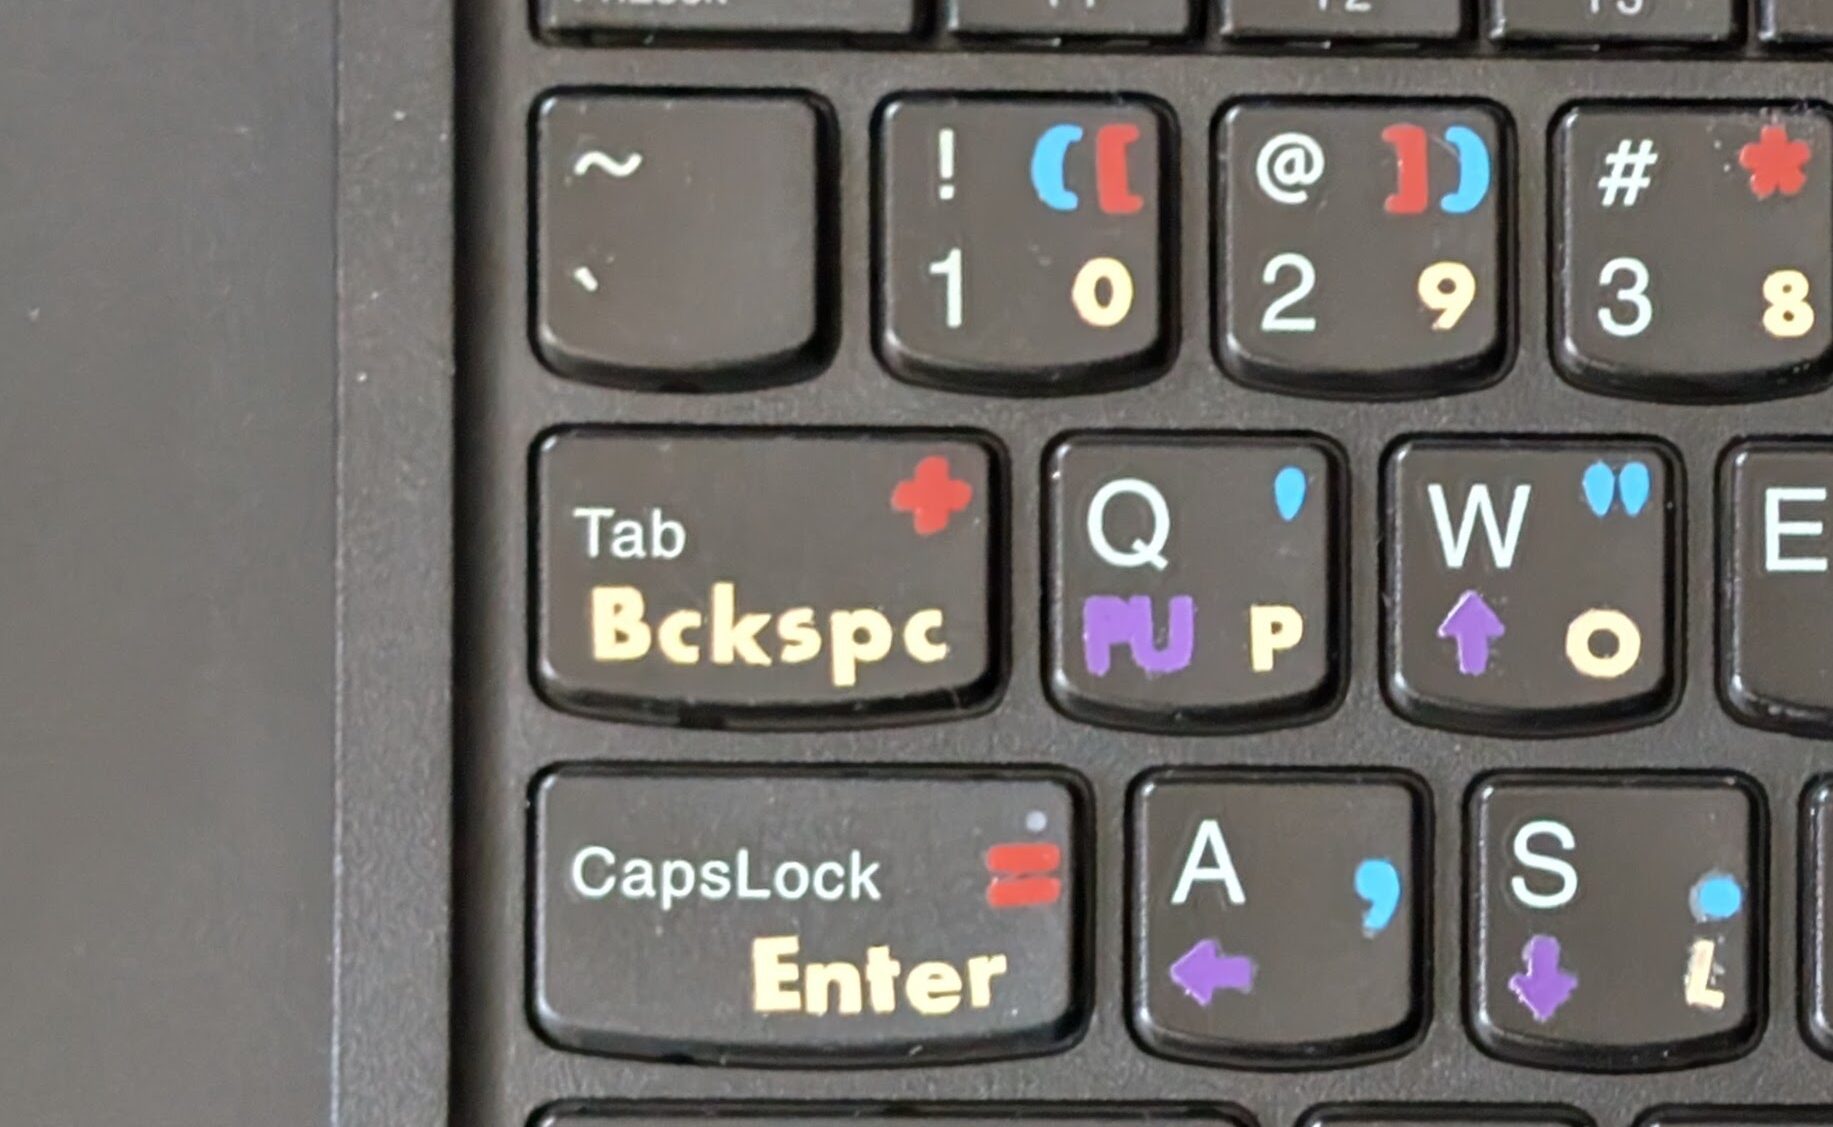 The scope of my design ambition was relatively modest at first. I set out to emulate the mirror functionality of the Half-QWERTY, creating a modifier to reflect letters from the right over to the left side of my two-handed board. But then I realized that I didn’t have to stop there. I could add more modifiers to bring over punctuation and navigation keys, as well as other outputs and functions. So I kept going, ultimately pulling the whole board into reach over on one side.
And Thus: The KURTY Single-Handed Half-Board Keymap
I’ve dubbed my design the KURTY Single-Handed Half-Board Keymap (a bit of fun up front, followed by a more descriptive tail). The keymap pairs well with my keyboard of choice, with its built-in mouse analog, but the KURTY is a computer-side system that will ultimately work with any attached two-handed board. Beyond that broader flexibility, this software-based solution has a number of other critical advantages over any given hardware keyboard alternative. For instance:
- I can copy it to share between my at-home desktop and portable laptop setups, without: having to buy multiple peripherals …
- … or carry around additional single-purpose hardware
- … or worry about a board physically breaking or needing repair.
- This keymap can also easily be evolved over time, reworked incrementally to suit changes in my needs and physical abilities.
The endless replicability of this solution also makes it easy (for me) to share with other users (like you!) for free. Toward that end, the third and final article in this set includes a setup file, user guide, and other support materials to help you set up your own KURTY. I hope others single-handed typists will find this keymap useful and pass it along!
Coming up next: the design process behind the current version of the KURTY, which was developed through extensive testing and iteration. You can also hop straight to the third installment — there you’ll find a layout file with setup instructions as well as a color-coded key guide and troubleshooting tips. It only takes a few minutes to deploy, and you can edit the keymap to suit your needs.
Adapt or Design — A Project of 99% Invisible

Leave a Comment
Share